If you’re diving into the world of Raspberry Pi, making the most of your small yet powerful device often means choosing the right display to accompany it. Whether you’re building a retro gaming console, a personal media center, or a custom smart home interface, the best Raspberry Pi displays can significantly enhance your project’s usability and aesthetics. With a range of options available, from compact screens for portability to high-resolution monitors for full-scale applications, selecting the perfect display can truly elevate your Raspberry Pi experience.
In this article, we will explore the top options on the market, highlighting their features, pros, and cons. We aim to simplify your decision-making process by providing an in-depth buying guide, so you can find a display that suits your needs perfectly. Whether you are a hobbyist, a seasoned developer, or someone looking to embark on an exciting DIY project, our comprehensive reviews will help you uncover the ideal screen to bring your vision to life.
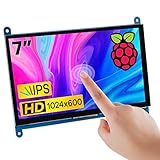
Before we get into the review of the best raspberry pi displays, here are some related products from Amazon to explore:


Last update on 2026-01-15 / Affiliate links / Paid Links / Images from Amazon Product Advertising API
Overview of Raspberry Pi Displays
Raspberry Pi displays play a critical role in enhancing the visual interface of projects powered by the popular microcomputer. These displays allow users to interact with their Raspberry Pi in a more intuitive manner, making them essential for everything from educational tools to advanced home automation systems. With a range of options available, users can choose displays that best fit their needs, whether for compact projects or larger installations.
One of the most appealing aspects of Raspberry Pi displays is their versatility. They come in various sizes, resolutions, and technologies, including LCD, LED, and OLED screens. This variety enables enthusiasts to select displays that optimize both performance and aesthetics, ensuring compatibility with their specific applications. The best raspberry pi displays not only support high-resolution graphics but also offer features like touch sensitivity and easy connectivity, enhancing the overall user experience.
In addition to size and resolution, Raspberry Pi displays differ in their modes of input and output. Some are designed for direct compatibility with Raspberry Pi boards, utilizing standard interfaces like HDMI or GPIO. Others may require additional adapters or adapters for specific connection types. This flexibility allows makers and developers to integrate displays into their projects seamlessly, regardless of the project’s complexity or intended use.
The market for Raspberry Pi displays has grown significantly, resulting in a wide range of products catering to different needs. From small screens suitable for portable projects to larger monitors ideal for presentations or development, there is a display option for every enthusiast. As technology continues to evolve, these displays become more powerful and user-friendly, enabling creators to push the boundaries of what can be achieved with Raspberry Pi systems.
The Best Raspberry Pi Displays
1. Official Raspberry Pi 7-inch Touchscreen Display
The Official Raspberry Pi 7-inch Touchscreen Display offers an impressive combination of size and functionality, making it a top choice for enthusiasts and professionals alike. With a resolution of 800×480 pixels, the display provides vibrant colors and clear visuals that enhance any project or application. The capacitive touch feature allows for intuitive interaction, giving users the ability to easily navigate interfaces and control applications with a simple touch.
In addition to its impressive display capabilities, this touchscreen is designed specifically for Raspberry Pi, featuring a DSI connector for seamless integration. The display also comes with a rear mounting option, allowing it to be easily attached to enclosures or other setups. Coupled with the sturdy build quality, it can withstand moderate use in various environments, making it a reliable choice for both hobbyists and educators working with Raspberry Pi.
2. Waveshare 5-inch HDMI LCD Display
The Waveshare 5-inch HDMI LCD Display is a compact solution that delivers impressive performance for its size. With a resolution of 800×480 pixels, the display ensures that images and text come through with clarity. The HDMI interface allows for compatibility with a wide array of devices, making it ideal for portable projects where space and weight are considerations. The touch support offers added functionality, perfect for interactive displays or portable applications.
One of the standout features of this display is its versatility. It supports both Raspberry Pi and other devices thanks to its mini HDMI connector, expanding its usability across different platforms. The display also comes with a touchscreen driver program which allows for easy setup and integration. Overall, the Waveshare 5-inch HDMI LCD Display provides a compact, high-quality option without compromising on functionality, making it a fantastic choice for project builders.
3. Kuman 7-inch HDMI Touchscreen Display
The Kuman 7-inch HDMI Touchscreen Display is an excellent product that bridges the gap between usability and affordability. With a resolution of 1024×600, this display offers high-definition visuals that enhance the viewing experience. The touch capabilities are responsive and allow for an engaging user experience, whether you’re creating a media center or developing an application. The screen’s compact size makes it perfect for projects where space is limited.
Beyond just visuals, this touchscreen display presents notable features like dual USB ports for touch and power connectivity, simplifying power management. It’s compatible with a wide range of operating systems, including Raspberry Pi OS, making it highly adaptable. Additionally, Kuman provides clear documentation for setup and installation, ensuring that users of all levels can easily incorporate this display into their projects. Overall, it combines practicality with performance at an accessible price point.
4. Elecrow 5-inch HDMI Raspberry Pi Screen
The Elecrow 5-inch HDMI Raspberry Pi Screen stands out for its incredibly compact design and high performance. With a resolution of 800×480, the display provides clear images and vibrant colors, making it suitable for various applications. The compact size means it can fit into tight spaces, ideal for portable projects, while still offering an engaging interface thanks to its touchscreen functionality. The included stand allows for easy positioning, maximizing user convenience.
What makes this display particularly advantageous is its versatility; it’s compatible with not just Raspberry Pi, but also other HDMI-enabled devices, enhancing its usability. The straightforward setup process and the plug-and-play capability are significant benefits for those who want minimal hassle. Additionally, the display supports multiple power supply options, making it adaptable for different project requirements. Overall, the Elecrow 5-inch HDMI screen is an excellent choice for users looking for quality in a small package.
5. SunFounder 10.1-inch HDMI Display
The SunFounder 10.1-inch HDMI Display is a robust option that’s perfect for those who require a larger screen for their Raspberry Pi projects. With a full HD resolution of 1280×800, this display delivers clear and detailed images, making it suitable for applications requiring high-quality visuals. The large touchscreen allows for effortless navigation and manipulation of content, enhancing the overall user experience significantly during presentations or media playback.
In addition to its display quality, this display features an HDMI interface that ensures compatibility with a variety of devices. It also comes with dual speakers, providing audio output without the need for additional peripherals. The SunFounder display is designed for durability and ease of use, making it a great addition for anyone looking to expand their Raspberry Pi capabilities. Whether you’re building a kiosk or a home automation system, this display offers excellent performance and reliability.
Why Do People Need to Buy Raspberry Pi Displays?
Raspberry Pi displays are essential components for users looking to enhance their projects and utilize the full potential of their Raspberry Pi devices. With these displays, users can interact with their projects in a more intuitive and efficient manner. Whether for educational purposes, DIY projects, or professional applications, having a dedicated screen allows for immediate feedback and control, enabling users to see their programming results and graphical interfaces in real-time.
One of the main reasons people invest in displays for their Raspberry Pi is the increased accessibility they provide. Many users, especially beginners, find it challenging to solely rely on command-line interfaces. A display helps bridge this gap by offering a visual representation of the Pi’s outputs, making it easier to navigate through applications and settings. This visual feedback fosters a more engaging learning environment, particularly in educational settings where students can see the direct impact of their code.
Moreover, the versatility of Raspberry Pi displays makes them suitable for a wide array of applications. From creating custom handheld gaming devices to developing sophisticated home automation systems, screens can be integral to the functionality of a project. The best Raspberry Pi displays often feature touchscreen capabilities, allowing for more interactive user experiences and the ability to implement gestures similar to those found on handheld devices or smartphones.
Finally, investing in a Raspberry Pi display can significantly elevate the functionality and aesthetic of a project. Many displays offer high resolution, vibrant colors, and sleek designs that not only enhance usability but also contribute to a polished final product. Whether for personal projects or professional prototypes, integrating a display can make a project look more complete and may even impress potential clients or users, ultimately making the initial investment worthwhile.
Reasons to Choose a Raspberry Pi Display
Raspberry Pi displays come with a multitude of benefits that cater to both hobbyists and professionals alike. One important reason for choosing a dedicated display is compatibility. Raspberry Pi displays are specifically designed to work seamlessly with various Raspberry Pi models, ensuring that you maximize the potential of your single-board computer without facing connectivity issues. These displays typically use connectors such as HDMI, DSI, or GPIO, making them remarkably easy to set up and integrate into your projects.
Another compelling reason is the range of sizes and resolutions available. From small screens perfect for portable projects to larger displays suitable for data visualization and interface design, users can find a display that meets their specific needs. This versatility allows builders to tailor their setups to various applications, whether it be for gaming, monitoring, or educational purposes. Additionally, high-resolution displays can enhance user experience, providing clear and vibrant visuals that are essential for intricate projects.
Durability is also a key consideration. Raspberry Pi displays are often designed with ruggedness in mind, catering to environments that might expose the device to physical wear and tear. Whether you’re using it in a laboratory, at a workshop, or on-the-go, many models feature sturdy glass screens and protective casing. Overall, selecting a Raspberry Pi display opens up a world of possibilities, allowing users to explore their creativity without sacrificing quality and functionality.
How to Set Up Your Raspberry Pi Display
Setting up a Raspberry Pi display is a straightforward process, especially if you follow a few essential steps. First, ensure you have all the necessary components at hand, including the Raspberry Pi unit, the display itself, any required cables, and a power supply. Before connecting everything, it’s advisable to gather your setup instructions, as different displays may have unique requirements.
Once you have everything ready, begin by connecting the display to your Raspberry Pi using the appropriate cables. For displays that connect via HDMI, simply plug one end into the HDMI port of the Raspberry Pi and the other into the display. If you’re using a touch screen with embedded capacities, make sure to connect any additional USB or GPIO pins as indicated by the display’s manual. Once the physical connections are established, power on both the Raspberry Pi and the display.
After startup, you may need to adjust some configuration settings based on your specific display model. This might include changing screen resolution or touch calibration in the Raspberry Pi’s settings menu. Manufacturers often provide proprietary software or drivers that can be installed to ensure optimal compatibility and performance. By following these steps, you’ll be ready to dive into your project and take full advantage of your new display.
Common Issues and Troubleshooting Tips
Even with its reputation for ease of use, setting up a Raspberry Pi display can sometimes present challenges. One common issue is that the display isn’t turning on when connected to the Raspberry Pi. In such cases, first check the power supply and ensure both devices are receiving adequate power. Additionally, verify that the connection cables are secure and undamaged. If the issue persists, try connecting the display to a different device to determine whether the problem lies with the Raspberry Pi or the display itself.
Another frequent problem involves resolution and display settings not aligning correctly. This can cause the screen to appear pixelated or cropped. To resolve this, access the Raspberry Pi configuration settings through the terminal or the desktop interface, and adjust the resolution settings manually. Some displays may also require specific resolutions for optimal performance; referring to the manufacturer’s guide can provide the necessary details about supported resolutions and refresh rates.
Touch-screen displays may also experience calibration issues, where the touch input does not correspond accurately to the intended locations on the screen. This can typically be adjusted in the settings menu or with specific calibration tools provided by the display manufacturer. If calibration does not resolve the issue, checking for driver updates or community forums may offer solutions from other users who have encountered similar issues.
Innovative Uses for Raspberry Pi Displays
Raspberry Pi displays are not just limited to traditional computer interfaces; their versatility opens the door to a plethora of innovative applications. One popular use case is for creating portable gaming consoles. Enthusiasts have been known to design handheld gaming devices powered by Raspberry Pi, integrating small displays and providing retro gaming experiences. With the right configuration, enthusiasts can run classic games and enjoy a fully functional gaming setup on the go.
Another creative application is in building digital signage systems. Businesses and organizations have turned to Raspberry Pi displays for showcasing advertisements, news, and informative content. By installing appropriate software and connecting to the internet, users can create dynamic content that’s easily updateable, allowing for real-time changes. This can be particularly useful for events, retail spaces, and educational institutions where up-to-date information is crucial.
In the realm of home automation and smart mirrors, Raspberry Pi displays offer incredible functionality. Users can creatively integrate displays into mirrors to provide real-time information like weather updates, news feeds, or calendar events while maintaining a chic appearance in their living spaces. Furthermore, Raspberry Pi displays can function as control panels for smart home devices, giving users a central interface to manage connected devices seamlessly. The endless possibilities make Raspberry Pi displays a favorite among creative tech enthusiasts and practical users alike.
Buying Guide for the Best Raspberry Pi Displays
When it comes to enhancing your Raspberry Pi projects, having the right display can make a significant difference. Whether you are building a media center, a retro gaming console, or a touch-sensitive interface, selecting the best Raspberry Pi displays can elevate your project. In this buying guide, we will explore the key factors to consider when choosing a display for your Raspberry Pi, helping you make an informed decision for your needs.
1. Display Size
The size of the display is one of the most crucial factors to consider when selecting a Raspberry Pi display. Depending on your specific project requirements, you might opt for a smaller display for a compact project or a larger screen for multimedia tasks. Common sizes range from 3.5 inches to 21 inches. For most DIY projects and portable applications, a 7-inch display serves as a sweet spot, balancing usability and compactness.
Moreover, choosing the right size can also affect your project’s portability and aesthetics. If you plan to integrate the display into a custom case or housing, ensure you measure the physical dimensions accurately. Understanding the available space for installation and the intended use will facilitate a more streamlined workflow and enhance the overall user experience of your project.
2. Resolution
Resolution plays an important role in the clarity and detail of the visuals displayed. Raspberry Pi displays range from low resolutions like 320×480 pixels to higher resolutions like 1920×1080 pixels or more. Higher resolution displays provide sharper images and better text rendering, which can be particularly useful for projects requiring detailed graphics, such as media centers or graphical user interfaces.
However, it’s essential to strike a balance between resolution and performance. Higher resolution monitors may require more processing power and might not be suitable for less powerful Raspberry Pi models. Take into consideration what you plan to use the display for; if it’s mostly for informational text and simple graphics, a lower resolution might suffice, saving on both cost and processing requirements.
3. Display Type
The type of display technology used is another critical decision when choosing a Raspberry Pi display. Two of the most common types are LCD and OLED. LCDs are typically more affordable and offer excellent color reproduction, but they can struggle with viewing angles and color accuracy. OLED displays, on the other hand, deliver deeper blacks and better contrast but may come at a higher price point.
Additionally, consider touchscreen capabilities if your project would benefit from user interaction. Touchscreen LCDs often provide excellent responsiveness and can make applications more intuitive. However, touchscreen displays usually require additional configurations or drivers, adding to the complexity of your project. Assess your goals to determine which display type is the best fit.
4. Connection Options
Connectivity is paramount when choosing a Raspberry Pi display. Different displays may use varying interfaces like HDMI, GPIO, or DSI (Display Serial Interface). HDMI is the most common and convenient option for connecting displays, providing high-quality video output. Most modern Raspberry Pi models support HDMI, making it a popular choice.
On the contrary, GPIO-connected displays typically require additional effort for installation and configuration but can be advantageous for smaller setups or when using specific types of displays that don’t support HDMI. Evaluate the connection method that aligns with your Raspberry Pi model and project requirements to ensure a seamless integration.
5. Aspect Ratio
The aspect ratio of the display dictates the width-to-height relationship, influencing how content is presented. Common aspect ratios include 4:3 and 16:9, with the latter being prevalent in modern displays due to its compatibility with videos and widescreen content. A display with a 16:9 ratio is typically better suited for multimedia projects, while a 4:3 ratio may be preferable for retro gaming projects or text-heavy applications.
Understanding your intended use will help you select the best aspect ratio. For example, if you are creating a dashboard or application focused on data visualization, a 16:9 display may enhance data presentation. Conversely, for projects that involve classic gaming emulation, a 4:3 monitor might provide a more authentic experience.
6. Budget
Budgeting is a significant factor when choosing any component for your Raspberry Pi projects, including displays. Raspberry Pi displays can vary tremendously in price, influenced by size, resolution, technology, and features. Setting a budget helps to narrow down your options based on your project specifications without overspending.
While it might be tempting to opt for the cheaper alternatives, it’s essential to consider long-term value and functionality. Investing a bit more on a quality display can enhance your project’s usability and lifespan. Prioritize essential features that align with your project requirements while keeping an eye on your budget to maximize your investment in the best Raspberry Pi displays.
FAQ
What types of displays are compatible with Raspberry Pi?
Raspberry Pi is designed to work with a variety of display types, including HDMI monitors, LCD screens, and OLED displays. You can connect full-sized HDMI monitors for a desktop experience or use smaller LCD screens for portable projects. Additionally, there are dedicated Raspberry Pi touchscreens that offer a user-friendly interface for various applications.
For specific projects, you might consider displays with GPIO interfaces or those that connect via DSI (Display Serial Interface). These provide opportunities for more compact designs or IoT applications. It’s essential to check the compatibility of any display with your specific Raspberry Pi model, as some displays may require additional adapters or specific configurations to function correctly.
What should I consider when choosing a display for Raspberry Pi?
When choosing a display for your Raspberry Pi, consider the screen size, resolution, and form factor based on your project requirements. A larger screen may enhance productivity if you’re using the Pi for tasks like coding or media consumption, while smaller screens are more suitable for portable or embedded applications. Additionally, resolution plays a crucial role in the clarity of visuals, with higher resolutions being preferred for detailed images and text.
Another important factor is the type of interface used for the connection, such as HDMI, DSI, or GPIO. Make sure the display is compatible with your particular Raspberry Pi model. Also, consider whether you need touchscreen functionality, which could add interactivity to your projects. Lastly, assess the price point and any additional features like built-in speakers or ease of mounting to determine the best fit for your needs.
Are touchscreen displays worth the investment?
Touchscreen displays can significantly enhance user interaction with your Raspberry Pi projects, making them more intuitive and user-friendly. If you’re working on applications where touch input would streamline operations, like kiosks or control panels, investing in a touchscreen can be invaluable. They allow for direct manipulation of the user interface, which can lead to a more engaging experience.
However, it’s essential to weigh the additional cost against the potential benefits. Basic HDMI displays are typically more affordable, and if your project doesn’t require touch functionality, it might be more cost-effective to choose a standard display. Consider your project scope and user needs to determine if a touchscreen adds sufficient value to justify the investment.
How do I set up a display with Raspberry Pi?
Setting up a display with your Raspberry Pi is typically a straightforward process. For HDMI displays, simply connect the HDMI cable from the display to the Raspberry Pi’s HDMI port. Once the Pi is powered on, it should automatically detect the connected display. You may need to adjust settings via the Raspberry Pi configuration tool to set the appropriate resolution or orientation if the display doesn’t show up correctly.
For other types of displays, like LCD or DSI screens, the setup might involve additional steps, such as connecting specific GPIO pins or installing drivers. Ensure that you follow the manufacturer’s instructions carefully, as each display may have unique setup requirements. After everything is connected, checking for updates in the Raspberry Pi operating system ensures that you have the latest drivers and support for your display.
What resolution should I look for in a Raspberry Pi display?
The resolution of a display significantly impacts both clarity and usability for Raspberry Pi applications. For standard desktop use, a resolution of 1920×1080 (Full HD) is often ideal as it provides enough screen real estate to multitask effectively. However, if you’re developing applications that require precise visuals, such as graphic design or programming, higher resolutions like 2560×1440 (QHD) or 3840×2160 (4K) might be beneficial.
For smaller displays used in embedded projects, such as a 7-inch display, resolutions like 800×480 or 1024×600 can still deliver satisfactory performance. It’s crucial to balance resolution with physical size; higher resolutions on smaller screens can lead to text being difficult to read. Assess your specific use case and preferences to determine the best resolution that meets your needs without compromising performance.
Can I use multiple displays with Raspberry Pi?
Yes, you can use multiple displays with a Raspberry Pi, but this typically depends on the model you have. For instance, the Raspberry Pi 4 supports dual monitor setup through two micro HDMI ports. This allows you to connect two HDMI displays simultaneously, which is ideal for multitasking or creating a multi-screen workstation. The Raspberry Pi’s operating system can handle multiple windows and applications across both screens seamlessly.
However, keep in mind that using multiple displays can impact performance, particularly if the Raspberry Pi is running resource-intensive applications. It’s essential to ensure your projects are optimized accordingly and that your power supply can handle the additional load. If you’re looking to create an extensive multi-display setup beyond two screens, you’ll need to explore additional solutions such as display adapters or more powerful alternatives.
What are some popular brands of Raspberry Pi displays?
Several brands specialize in Raspberry Pi-compatible displays, each offering unique features and specifications. Official Raspberry Pi products, such as the Raspberry Pi touchscreen display, are designed to integrate seamlessly with the Raspberry Pi ecosystem, ensuring compatibility and ease of use. Other popular brands include Waveshare and Adafruit, which are known for their variety of LCD and OLED displays suited for various projects and applications.
In addition to dedicated Raspberry Pi brands, some traditional monitor manufacturers provide compatibility with Raspberry Pi systems. Brands like ASUS, Acer, and Dell offer a range of monitors with HDMI inputs that are fantastic for general use. When choosing a brand, consider customer reviews, warranty options, and support to make a well-informed decision on your display purchase.
Conclusion
In conclusion, investing in the best Raspberry Pi displays can significantly enhance your projects, whether you’re using them for home automation, gaming, or creating stunning visual interfaces. With a variety of options available, from high-resolution screens to touch-enabled displays, you have the ability to tailor your setup to your specific needs and preferences. The right display can not only improve functionality but also elevate the overall aesthetics of your project, making it a worthwhile consideration for any Raspberry Pi enthusiast.
Ultimately, as you explore the available choices, remember to consider factors such as size, resolution, compatibility, and touch capabilities to select the display that best suits your requirements. By integrating one of the best Raspberry Pi displays into your setup, you can unlock greater potential for creativity and functionality, ensuring that your projects stand out and perform efficiently. Invest wisely, and watch your Raspberry Pi come to life like never before.